Recent Posts
The Role of Proper Insulation in Preventing Water Damage: Expert Tips from SERVPRO®
3/12/2025 (Permalink)
 Water damage can be a homeowner’s worst nightmare in Hutto, TX, causing costly repairs, structural issues, and significant inconvenience.
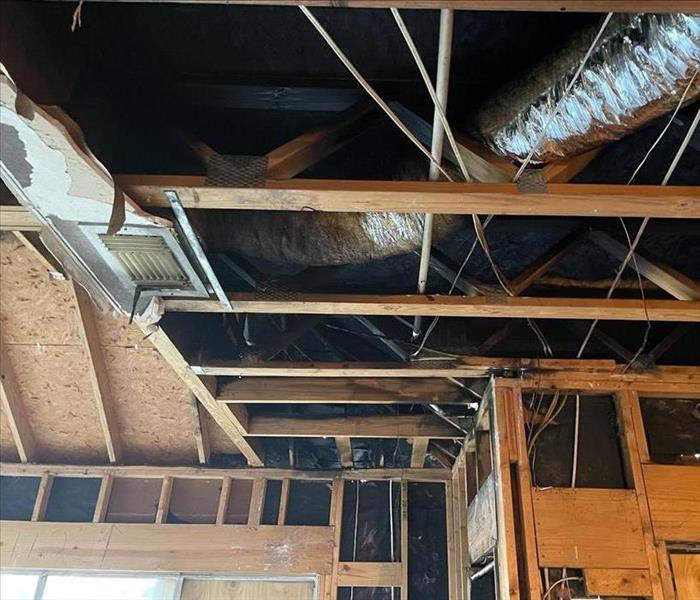
Water damage can be a homeowner’s worst nightmare in Hutto, TX, causing costly repairs, structural issues, and significant inconvenience. One often overlooked yet highly effective way to prevent water damage is by ensuring proper insulation in your home or business. Insulation does more than just regulate temperature—it acts as a barrier against moisture intrusion, condensation buildup, and costly water-related issues.
At SERVPRO®, we’ve seen firsthand the devastating effects of water damage caused by poor insulation. In this blog, we’ll dive deep into how insulation helps prevent water damage and provide expert insights on the best insulation techniques to protect your property.
How Does Insulation Help Prevent Water Damage?
Insulation plays a crucial role in protecting your home from unwanted moisture and water damage. Here’s how:
- Moisture Control – Proper insulation helps regulate humidity levels, reducing the risk of condensation, which can lead to structural issues.
- Prevents Ice Dams – In colder climates, poor insulation can cause uneven roof temperatures, leading to ice dams that force water under shingles.
- Barrier Against Leaks – Certain types of insulation, such as closed-cell spray foam, act as a water-resistant barrier, preventing water intrusion from small leaks.
- Reduces Temperature Fluctuations – Drastic temperature changes can cause condensation, which can seep into walls and ceilings, leading to water damage over time.
- Enhances Structural Integrity – Water-damaged materials weaken over time. Insulation helps prevent moisture buildup, preserving the strength of walls, ceilings, and floors.
By properly insulating your home, you can mitigate the risks associated with water damage, saving time and money on future repairs.
Best Insulation Techniques to Prevent Water Damage
Not all insulation is created equal when it comes to moisture protection. Here are some expert-recommended techniques to safeguard your property:
1. Use Water-Resistant Insulation Materials
Certain types of insulation offer better moisture resistance than others. Consider these options:
- Closed-Cell Spray Foam – Acts as an air and moisture barrier, preventing leaks and condensation.
- Rigid Foam Board – Highly resistant to water absorption and often used in basements and crawl spaces.
- Fiberglass with a Vapor Barrier – Traditional fiberglass insulation should be installed with a vapor barrier to prevent moisture buildup.
2. Insulate Pipes to Prevent Freezing and Bursting
One of the most common causes of water damage is burst pipes. Properly insulating pipes with foam pipe wrap or heat tape helps prevent freezing and subsequent water leaks.
3. Ensure Proper Attic Insulation to Avoid Ice Dams
Ice dams form when warm air escapes through an under-insulated attic, causing snow to melt and refreeze at the roof’s edge. Adding insulation to your attic prevents heat loss, reducing the risk of ice dams and water intrusion.
4. Seal Gaps and Cracks to Prevent Moisture Entry
Even the best insulation won’t be effective if there are gaps where moisture can enter. Use caulk, weather stripping, or expanding foam to seal air leaks around windows, doors, and utility openings.
5. Install Vapor Barriers in Basements and Crawl Spaces
Basements and crawl spaces are prone to moisture issues. Installing a vapor barrier on walls and floors helps block moisture from seeping into insulation and walls, preventing water damage.
6. Maintain Proper Ventilation to Prevent Condensation
Proper ventilation in attics, basements, and crawl spaces helps keep moisture levels in check. Ridge vents, soffit vents, and dehumidifiers can help improve airflow and reduce condensation risks.
Frequently Asked Questions (FAQs)
Q: What is the best insulation to prevent water damage?
A: Closed-cell spray foam and rigid foam board are among the best choices for moisture-resistant insulation. They provide excellent water resistance and help prevent leaks and condensation.
Q: Can insulation stop water leaks?
A: While some insulation types (like spray foam) act as a moisture barrier, insulation alone won’t stop major leaks. Proper drainage, sealing cracks, and regular inspections are essential for preventing leaks.
Q: How can I tell if my home has poor insulation leading to water damage?
A: Signs include condensation on windows, uneven indoor temperatures, mold growth, and high energy bills. If you suspect insulation issues, consider a professional inspection.
Q: Is it necessary to insulate a crawl space?
A: Yes, crawl spaces are prone to moisture buildup. Insulating them with rigid foam and adding a vapor barrier can prevent water damage and improve energy efficiency.
Q: Can I install insulation myself, or should I hire a professional?
A: While some insulation types (like fiberglass batts) can be installed DIY, materials like spray foam require professional application to ensure proper coverage and effectiveness.
Proper insulation is a key defense against water damage. It helps regulate moisture, prevent leaks, and protect the structural integrity of your home or business. Whether you're upgrading insulation or addressing problem areas, investing in high-quality insulation can save you from costly repairs down the road.
At SERVPRO, we understand the importance of water damage prevention. If you suspect insulation issues or need expert assistance with water damage restoration, our team is here to help. Contact SERVPRO today for professional guidance on protecting your property from moisture-related issues.
Implementing the right insulation techniques can keep your home dry, safe, and well-protected for years to come.
How to Prevent Fires Caused by Lightning Strikes: Expert Tips from SERVPRO®
12/18/2024 (Permalink)
 This blog provides expert insights on how to protect your property from fires caused by lightning strikes.
Lightning strikes are a natural phenomenon that can lead to devastating fires, causing damage to homes, businesses, and critical infrastructure. The National Fire Protection Association (NFPA) reports that between 2014 and 2018, an average of 22,600 fires per year were started by lightning, leading to property damage totaling around $451 million annually source.
While we can’t prevent lightning, we can certainly take steps to reduce the risk of lightning-induced fires. This blog provides expert insights on how to protect your property from fires caused by lightning strikes, ensuring that your home or business is as prepared as possible.
How Lightning Strikes Cause Fires
When lightning strikes a building or structure, the intense heat can cause surrounding materials to ignite. Fires typically occur in areas where the lightning has made contact, such as the roof, attic, or nearby trees. Electrical wiring, appliances, and electronic devices are also susceptible to lightning, as the surge of electricity can cause sparks that ignite fires.
Understanding the risks is the first step in mitigating fire hazards. By following a few preventive measures, you can significantly reduce the likelihood of a fire caused by a lightning strike.
Expert Tips for Preventing Fires from Lightning Strikes
Here are some proven strategies to protect your property from fires caused by lightning strikes:
1. Install a Lightning Protection System
A lightning protection system (LPS) is one of the most effective ways to safeguard your property from fires caused by lightning. These systems typically include lightning rods, conductors, and ground rods that redirect the electrical energy from a lightning strike safely into the ground, away from your building.
- Lightning rods: These metal rods are placed on the highest points of a building to attract lightning strikes.
- Conductors: These cables safely carry the electrical charge from the lightning rod to the ground.
- Ground rods: These rods disperse the electricity into the earth, reducing the risk of fire.
Installing an LPS can significantly reduce the chances of a lightning-induced fire, making it a worthwhile investment for any business or homeowner.
2. Inspect and Maintain Roofing Materials
The roof is one of the most vulnerable parts of a building during a lightning strike. Certain materials, such as wood shingles, can ignite easily when exposed to the heat of a lightning strike. To reduce fire risks, consider using fire-resistant roofing materials, such as asphalt shingles, metal, or clay tiles.
Additionally, regular roof maintenance is critical. Remove debris, such as leaves and branches, which could catch fire if struck by lightning. A clean and well-maintained roof reduces the fuel available for a potential fire.
3. Install Surge Protectors for Electrical Systems
Electrical fires are a common consequence of lightning strikes. A lightning surge can overload your electrical system, causing sparks and fires. Installing surge protectors can help safeguard your appliances, electronics, and wiring from these powerful surges of electricity.
Consider installing whole-house surge protectors or individual surge protectors for sensitive electronic devices like computers, televisions, and security systems. This is especially important for businesses that rely on critical electronic systems to maintain operations.
4. Trim Trees and Remove Dead Branches
Trees can act as conductors during a lightning strike, especially if they are tall or located near your home or business. Dead or overgrown branches can easily ignite when struck by lightning, and if they are close to your building, the fire can spread rapidly.
Regular tree maintenance, including trimming branches and removing dead or overhanging limbs, can reduce this risk. Keeping trees a safe distance from your property also helps prevent fire from spreading to the structure in the event of a lightning strike.
5. Create a Fire Break Around Your Property
A fire break is a gap in vegetation that can help slow or stop the spread of fire. Maintaining a defensible space around your property by clearing away flammable materials like dry leaves, shrubs, and firewood can reduce the risk of a lightning-induced fire spreading to your building.
Create a fire-safe landscape by planting fire-resistant plants and maintaining a safe zone of at least 30 feet around your property. This space acts as a buffer, giving you more protection in case of a fire sparked by lightning.
6. Have Fire Extinguishers and Detectors Ready
While prevention is key, being prepared to respond to a fire is just as important. Ensure that your property is equipped with up-to-date fire extinguishers and smoke detectors. Place extinguishers in easily accessible areas, such as kitchens, electrical rooms, and near exits.
Regularly test smoke detectors to ensure they are functioning properly, and consider installing a monitored fire alarm system that alerts authorities in the event of a fire.
At SERVPRO, we understand the importance of protecting your home or business from fire hazards. Our fire safety experts can help assess your property’s vulnerabilities, recommend preventive measures, and provide restoration services if a fire occurs.
Our team is available 24/7 to assist in fire damage restoration and cleanup, ensuring your property is back to normal as quickly as possible. Don’t wait until it’s too late—take steps today to protect your property from fires caused by lightning strikes.
Final Thoughts: Protecting Your Property from Lightning-Induced Fires
Lightning is unpredictable, but with the right preventive measures, you can significantly reduce the risk of a fire. From installing a lightning protection system to maintaining your roof and trees, these proactive steps help safeguard your property from lightning-related fire hazards.
If you need help assessing or improving your fire safety measures, SERVPRO is here to provide expert guidance and services. Reach out to us today to ensure your home or business is protected from the dangers of lightning-induced fires.
The Most Common Types of Mold Found in Homes: Expert Insights from SERVPRO®
11/13/2024 (Permalink)
 In this blog, we’ll explore the most common types of mold found in homes, offering expert insights on how to identify and address these mold issues.
Mold is a common issue that many homeowners face in Hutto, TX, especially in areas prone to moisture and humidity. While mold might seem like a minor nuisance, understanding the different types of mold that can grow in your home is essential for proper prevention and remediation. Each type of mold has unique characteristics, and knowing what you’re dealing with can help you address it effectively and protect your property.
In this blog, we’ll explore the most common types of mold found in homes, offering expert insights on how to identify and address these mold issues.
Mold in Homes: A Common Problem
Mold can develop anywhere there is moisture, warmth, and organic material. Whether it's from a leaking pipe, poor ventilation, or a damp basement, mold can quickly take hold. According to the Environmental Protection Agency (EPA), approximately 10% of U.S. households report mold problems at any given time. You can read more about mold prevention and management tips from the EPA.
Now, let’s take a closer look at the most common types of mold found in homes and what you need to know about each one.
1. Cladosporium
Characteristics:
Cladosporium is a common mold type that typically appears as black, green, or brown spots. It often grows on surfaces like wood, carpets, and fabrics, but can also be found on HVAC systems, especially if the filters are not maintained.
Where It’s Found:
You’ll commonly find Cladosporium in areas with poor ventilation or where moisture tends to collect, such as attics, basements, or closets.
Prevention Tip:
To prevent Cladosporium growth, ensure your home has proper ventilation and reduce humidity levels, particularly in closets and basements.
2. Aspergillus
Characteristics:
Aspergillus is another prevalent mold type that comes in a variety of colors, including white, green, and yellow. This mold can spread quickly under the right conditions, especially in areas with high humidity or water damage.
Where It’s Found:
Aspergillus commonly grows on organic materials like wood, paper products, and even food. It’s often found in damp walls, insulation, and under sinks where water leaks have occurred.
Prevention Tip:
Fixing leaks and ensuring proper drainage around the foundation of your home can help prevent the growth of Aspergillus in walls and other areas prone to water damage.
3. Stachybotrys (Black Mold)
Characteristics:
Stachybotrys, also known as black mold, is infamous for its dark green or black appearance. It grows in areas that are consistently damp and is often associated with severe water damage.
Where It’s Found:
This mold is often found in places like bathrooms, kitchens, and laundry rooms, where pipes can leak, and water may accumulate unnoticed.
Prevention Tip:
To prevent black mold, fix any persistent water leaks immediately and ensure these areas are well-ventilated to reduce moisture buildup.
4. Penicillium
Characteristics:
Penicillium is known for its blue or green color and powdery texture. It spreads quickly and can often be found on water-damaged materials, such as wallpaper, carpet, and insulation.
Where It’s Found:
Penicillium thrives in areas that have experienced water damage, such as basements after flooding or areas around leaky roofs and windows.
Prevention Tip:
After any water damage incident, ensure that affected areas are thoroughly dried within 24-48 hours to prevent mold growth, especially Penicillium.
5. Alternaria
Characteristics:
Alternaria is a fast-growing mold that appears in black or dark brown patches. It thrives in damp areas and is most commonly found outdoors but can easily enter the home through windows, doors, and HVAC systems.
Where It’s Found:
Alternaria is commonly found in bathrooms, showers, and around window frames, especially if condensation forms regularly.
Prevention Tip:
Reduce humidity in bathrooms by using exhaust fans and cleaning water-prone areas like shower curtains and tiles regularly.
How to Prevent Mold in Your Home
While these are some of the most common molds found in homes, the key to prevention is controlling moisture. Here are some expert tips to keep mold at bay:
- Fix Water Leaks Promptly: Any leaks from pipes, roofs, or windows should be addressed immediately to prevent moisture buildup.
- Improve Ventilation: Ensure that high-moisture areas, such as bathrooms, kitchens, and basements, are properly ventilated. Use fans or dehumidifiers as needed.
- Monitor Humidity Levels: Keep your home’s humidity level between 30% and 50%. A hygrometer can help you track indoor humidity.
- Dry Water-Damaged Areas Quickly: After a flood or significant water exposure, thoroughly dry affected areas within 24 to 48 hours to prevent mold growth.
- Regular Cleaning and Maintenance: Regularly clean areas prone to moisture, such as bathrooms, kitchens, and basements. Keep HVAC systems clean and functioning properly to prevent mold from spreading through the air.
Trust SERVPRO for Mold Remediation
Mold problems can escalate quickly, especially if left undetected or untreated. If you notice signs of mold growth in your home, it’s important to seek professional help. SERVPRO offers expert mold remediation services, ensuring that your home is thoroughly inspected, treated, and restored to a mold-free condition. With years of experience, our team is equipped with the latest technology to address all types of mold infestations effectively.
Understanding the most common types of mold found in homes can help you take preventive measures to protect your property. Whether it's the fast-spreading Penicillium or the notorious black mold (Stachybotrys), every mold type presents its challenges. The key is early detection, proper maintenance, and immediate action when signs of mold appear. If you need assistance with mold prevention or remediation, SERVPRO is Here to Help® provide expert support and ensure your home stays safe and mold-free.
How Thermal Imaging Reveals Hidden Water Damage Your Home
10/16/2024 (Permalink)
Water damage is one of the most common and potentially devastating issues homeowners in Hutto, TX, can face. While some water damage is easy to spot, like a leaky faucet or a flooded basement, much of it can go unnoticed until it’s too late. Hidden water damage can lurk behind walls, under floors, or in attics, causing long-term damage and leading to expensive repairs. Thankfully, modern technology, like thermal imaging, is revolutionizing the way restoration professionals detect and address these hidden problems.
The Challenge of Detecting Hidden Water Damage
Hidden water damage is particularly dangerous because it often goes undetected for long periods. By the time you notice signs like mold growth, musty odors, or warped flooring, the damage has already been done. Traditional methods of detecting water damage often rely on visible signs or invasive techniques like cutting into walls, which can be both time-consuming and destructive.
How Thermal Imaging Works
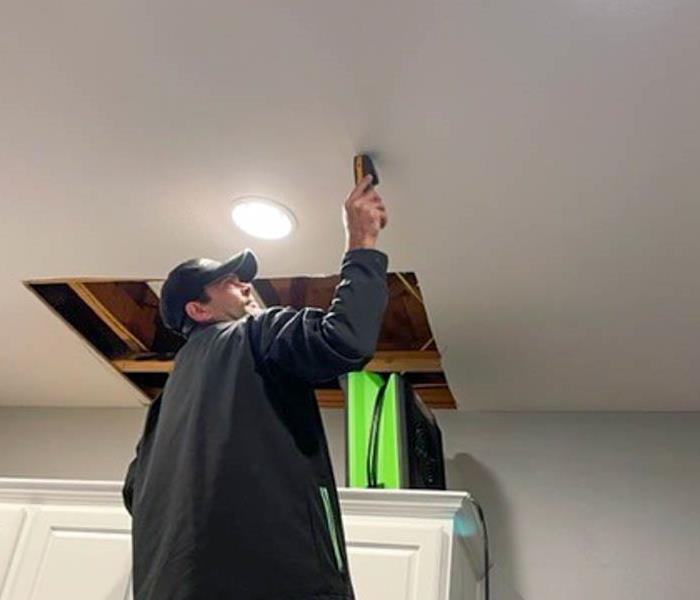
Thermal imaging is a non-invasive technology that allows professionals to detect hidden water damage without tearing apart your home. It works by using infrared cameras to detect temperature variations on surfaces. Waterlogged areas tend to retain heat differently than dry areas, creating a thermal signature that the camera can detect.
The Benefits of Thermal Imaging
Thermal imaging offers several benefits for homeowners and restoration professionals, such as:
Non-Invasive Detection: Thermal imaging allows for a thorough inspection without the need to drill holes or remove drywall. This means your home remains intact during the inspection process.
Accurate and Fast Results: Infrared cameras can quickly scan large areas and pinpoint the exact location of moisture, allowing restoration professionals to address the problem before it spreads.
Early Detection Saves Money: By identifying hidden water damage early, thermal imaging can prevent minor issues from becoming major, costly repairs. The sooner water damage is detected, the less extensive the restoration work will need to be.
Comprehensive Assessments: Thermal imaging can reveal water damage in areas that are often overlooked, such as inside walls, under flooring, or in the ceiling. This ensures that no moisture is left behind, reducing the risk of mold growth and structural damage.
The Importance of Professional Water Damage Inspections
While thermal imaging is a powerful tool, it’s just one part of a professional water damage inspection. At SERVPRO of Hutto, our team combines thermal imaging with moisture meters, hygrometers, and other advanced tools to ensure that every trace of water damage is detected and addressed.
Protect Your Hutto Home with Advanced Technology
Hidden water damage doesn’t have to be a nightmare. With modern technology like thermal imaging, SERVPRO® can help you uncover and address issues before they become serious problems. If you suspect water damage in your home, don’t wait—contact us today for a thorough inspection and expert restoration services.
Comprehensive Guide to Assessing Structural Damage After a Severe Storm
9/11/2024 (Permalink)
 We will discuss key steps in assessing structural damage after a severe storm, ensuring your property is safe and secure.
Severe storms in Hutto, Texas, can cause significant structural damage to homes and businesses, leaving property owners with the daunting task of assessing and repairing the destruction. Understanding how to properly evaluate the extent of the damage is crucial for effective restoration. In this guide, we will discuss key steps in assessing structural damage after a severe storm, ensuring your property is safe and secure.
Importance of Immediate Assessment
After a storm passes, the first and most important step is to conduct an immediate assessment of your property. Delaying this process can lead to further deterioration and increased repair costs. Identifying damage early allows you to address critical issues promptly, minimizing potential hazards and ensuring the structural integrity of your building.
Common Types of Structural Damage
Roof Damage
Roof damage is one of the most common types of structural damage caused by severe storms. Look for missing shingles, leaks, and dents caused by hail. Even minor damage can lead to significant issues if not addressed quickly.
Foundation Cracks
High winds and flooding can result in foundation cracks. Inspect the base of your property for any new or widened cracks. These can compromise the stability of your building and should be evaluated by a professional.
Water Intrusion
Water intrusion can lead to extensive damage, including mold growth and weakening of structural elements. Check for signs of water entry around windows, doors, and basements. Immediate drying and dehumidification are crucial to prevent further damage.
Statistically Speaking: Storm Damage in Texas
According to the Insurance Information Institute, Texas leads the nation in the number of major disaster declarations, many of which are due to severe storms. In 2020 alone, Texas experienced 42 major disaster declarations, highlighting the importance of being prepared and knowledgeable about storm damage assessment.
Steps to Assess Structural Damage
Safety First
Before beginning any assessment, ensure that the area is safe. Look out for hazards like downed power lines, sharp debris, and unstable structures. Wear protective gear to minimize injury risks.
Document the Damage
Thoroughly document all visible damage. Take clear photos and videos, and make detailed notes. This documentation will be invaluable for insurance claims and repair planning.
Engage Professionals
While some damage can be identified through a visual inspection, it's essential to engage professionals for a comprehensive assessment. Structural engineers and restoration experts can provide detailed evaluations and recommend necessary repairs.
Contact Your Insurance Company
Report the damage to your insurance company as soon as possible. Provide them with your documentation to expedite the claims process. Understanding your coverage and working closely with your insurer will help ensure a smooth recovery.
Conclusion
Assessing structural damage after a severe storm is a critical step in protecting your property and ensuring safety. By conducting thorough inspections, documenting damage, and engaging professionals, you can effectively address storm damage and restore your property. Remember, timely action can significantly reduce repair costs and prevent further deterioration. If you need professional assistance, SERVPRO® is Here to Help® with expert storm damage restoration services.
How to Accurately Assess the Extent of Fire Damage in Your Home
8/14/2024 (Permalink)
 SERVPRO® provides a step-by-step guide to help you assess fire damage accurately.
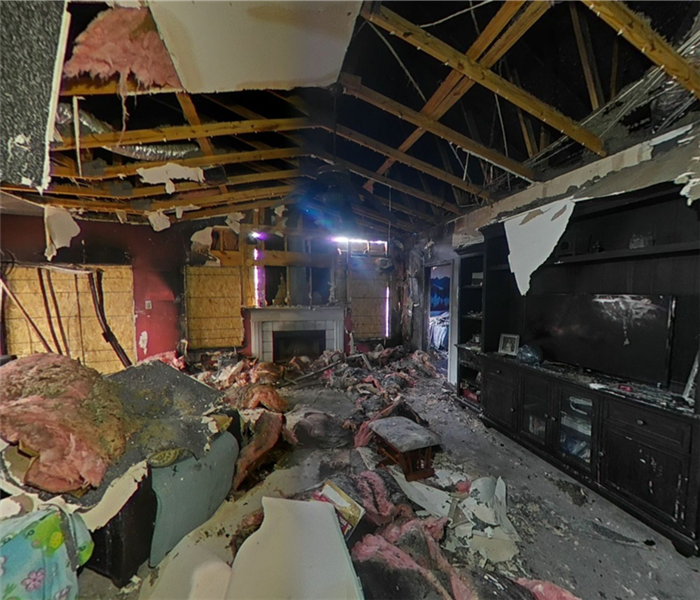
Experiencing a fire in your home in Hutto, TX, is distressing, and assessing the extent of the damage can be overwhelming. However, a thorough evaluation is crucial for effective restoration and recovery. In this blog, SERVPRO® provides a step-by-step guide to help you assess fire damage accurately, ensuring a smoother restoration process and a safer home environment.
Initial Safety Precautions
Ensure Safety First
Before entering your home after a fire, ensure it is safe to do so. Wait for clearance from the fire department and avoid entering if there are structural issues or potential hazards.
Protective Gear
Wear protective gear such as gloves, masks, and sturdy shoes to protect yourself from soot, ash, and potentially hazardous debris.
Exterior Damage Assessment
Structural Integrity
Start by inspecting the exterior of your home. Look for visible signs of structural damage, such as:
- Cracked or buckled walls
- Damaged roof
- Broken windows
Smoke and Soot Residue
Check for smoke and soot stains on the exterior walls and roof. Extensive smoke damage on the outside can indicate severe internal damage.
Interior Damage Assessment
Structural Damage
Once inside, carefully inspect each room for structural damage. Pay close attention to:
- Walls and ceilings: Look for cracks, warping, or collapse.
- Floors: Check for buckling, warping, or instability.
Smoke and Soot Damage
Smoke and soot can penetrate walls, ceilings, and furniture, causing extensive damage. Assess the extent of smoke and soot by:
- Inspecting surfaces: Look for discoloration and soot deposits on walls, ceilings, and furniture.
- Checking for odors: Persistent smoke odor indicates extensive smoke damage.
Damage to Personal Belongings
Furniture and Appliances
Evaluate the condition of your furniture and appliances. Smoke and heat can cause irreversible damage to these items, so check for:
- Charring and discoloration
- Odor and soot deposits
Electronics
Inspect electronic devices carefully. Smoke and soot can damage internal components, so check for:
- Visible damage
- Operational issues
Important Documents
Locate and assess important documents. If they are damaged by smoke or water, consider using professional restoration services to recover them.
Secondary Damage
Water Damage
Firefighting efforts often result in water damage. Check for:
- Standing water
- Damp walls, floors, and ceilings
- Mold growth
Mold and Mildew
Due to water exposure, mold and mildew can develop quickly. Inspect damp areas and take action to prevent mold spread.
Professional Assistance
Engage Professional Services
While initial assessments can provide a general idea of the damage, engaging professional fire damage restoration services is crucial for a comprehensive evaluation and restoration plan. SERVPRO's experts use advanced equipment and techniques to identify and mitigate all types of fire damage effectively.
Insurance Documentation
Document all damage with photographs and detailed notes to assist with insurance claims. Professional services can also help with the documentation process.
Conclusion
Accurately assessing the extent of fire damage in your home is essential for effective restoration. By following these steps and engaging professional help from SERVPRO, you can ensure a thorough evaluation and a smooth recovery process. Trust SERVPRO to guide you through the restoration, bringing your home back to its pre-fire condition swiftly and safely.
Effective Strategies for Removing Mold in a Shower
7/10/2024 (Permalink)
 We explore these strategies and provide practical tips for keeping your shower clean and mold-free.
Mold growth in showers is a common problem faced by many homeowners. The warm, moist environment of a shower provides the perfect breeding ground for mold spores to thrive and proliferate. Fortunately, there are several effective strategies for removing mold in a shower and preventing its recurrence. In this blog post, we'll explore these strategies and provide practical tips for keeping your shower clean and mold-free.
Identifying Mold in a Shower:
Before discussing how to remove mold in a shower, it's essential to identify its presence. Mold in a shower typically appears as black, green, or brown spots on grout, caulking, tile surfaces, or shower curtains. Additionally, musty odors and a slimy or fuzzy texture may indicate mold growth.
Cleaning Mold with Household Solutions
Vinegar:
Vinegar is a natural and effective cleaner that can help remove mold from shower surfaces. Simply fill a spray bottle with white vinegar and spray it directly onto the affected areas. Let the vinegar sit for several hours or overnight, then scrub the mold away with a brush or sponge. Rinse the area thoroughly with water afterward.
Baking Soda:
Baking soda is another household ingredient that can help eliminate mold in a shower. Create a paste by mixing baking soda with water, then apply it to the moldy surfaces. Allow the paste to sit for about 30 minutes before scrubbing the mold away with a brush or sponge. Rinse the area thoroughly with water to remove any residue.
Hydrogen Peroxide:
Hydrogen peroxide is a powerful antifungal agent that can effectively kill mold spores in a shower. Pour hydrogen peroxide into a spray bottle and apply it directly to the moldy areas. Allow it to sit for 10-15 minutes, then scrub the mold away with a brush or sponge. Rinse the area thoroughly with water afterward.
Using Commercial Mold Cleaners
Mold and Mildew Cleaners:
There are numerous commercial mold and mildew cleaners available on the market that are specifically formulated to remove mold in showers. These cleaners often contain ingredients such as bleach, ammonia, or hydrogen peroxide, which can effectively kill mold spores and prevent their regrowth. Follow the manufacturer's instructions carefully when using these products.
Shower Cleaners with Mold Prevention:
Some shower cleaners are formulated not only to remove existing mold but also to prevent its recurrence. These cleaners often contain ingredients that create a protective barrier on shower surfaces, making it more difficult for mold spores to take hold. Regular use of these cleaners can help keep your shower clean and mold-free.
Preventing Mold Regrowth:
After removing mold from a shower, it's essential to take steps to prevent its regrowth. Keep the shower area well-ventilated by using exhaust fans or opening windows to reduce moisture buildup. Additionally, regularly clean and dry shower surfaces to prevent mold-friendly conditions from developing.
Removing mold in a shower requires diligence and proper cleaning techniques. Whether using household solutions or commercial cleaners, it's essential to thoroughly clean and disinfect shower surfaces to eliminate mold spores effectively. By incorporating preventive measures into your cleaning routine, you can keep your shower clean and mold-free for years to come. If you encounter severe or recurring mold issues in your shower, consider seeking professional assistance from a restoration company like SERVPRO® for thorough mold remediation.
Emergency Preparedness: Creating a Water Damage Escape Plan
6/14/2024 (Permalink)
Water damage can be a serious threat to your home and family, especially during floods, hurricanes, or other severe weather events. Being prepared with a water damage escape plan can help you respond quickly and effectively to protect yourself and your loved ones. Here's how you can create an effective water damage escape plan for your home.
Understand the Risks
Identify potential water damage risks in your area, such as floods, hurricanes, or heavy rains. Familiarize yourself with local flood zones and evacuation routes. Additionally, assess the vulnerabilities of your home, such as low-lying areas or basements prone to flooding.
Create an Evacuation Plan
Design an evacuation plan that includes escape routes from each room in your home. Make sure each family member knows how to safely exit the house in case of water damage. Establish a designated meeting point outside the home where everyone can gather once they have evacuated.
Assemble an emergency kit with essentials such as water, non-perishable food, flashlights, batteries, a first aid kit, medications, and important documents in waterproof containers. Keep the kit in an easily accessible location so you can grab it quickly during an evacuation.
Secure Important Documents and Valuables
Protect important documents, such as birth certificates, passports, insurance papers, and financial records, by storing them in a waterproof and fireproof safe. Make digital backups of these documents and store them securely online.
If you live in an area prone to flooding, elevate appliances and electronics above ground level to protect them from water damage. Use waterproof covers when possible to shield your belongings from moisture.
Stay Informed
Monitor weather forecasts and emergency alerts for your area. Sign up for notifications from local authorities to stay updated on potential weather events and evacuation orders.
Regularly practice your water damage escape plan with your family. Conduct drills to ensure everyone knows what to do and where to go in the event of an emergency. Familiarize yourself with alternative exits and evacuation routes.
Shut Off Utilities and Secure your Pets
Know how to safely shut off your home's utilities, including water, gas, and electricity. In the event of a flood or water damage, shutting off these utilities can prevent further damage and potential hazards.
Include your pets in your escape plan. Prepare carriers or leashes, and make sure your pets have identification tags and up-to-date vaccinations. Pack food, water, and any medications they may need.
Communicate with Neighbors
Establish communication with your neighbors to share information and resources during emergencies. They may be able to provide assistance or alert you to potential risks in the area. Review your homeowner's insurance policy to ensure it covers water damage and flooding. Consider purchasing additional coverage if you live in a high-risk area.
By creating a comprehensive water damage escape plan and preparing for potential emergencies, you can help keep your family safe and minimize the impact of water damage on your home. Take the time to review your plan regularly and make updates as needed to stay prepared for any water-related event.
Mold Remediation After Storms and Flooding: Restoring Safety
5/28/2024 (Permalink)
Storms and flooding can wreak havoc on homes and businesses, leaving behind more than just visible damage. One of the most insidious consequences of water intrusion is mold growth. Mold thrives in damp, humid environments, making flooded properties prime breeding grounds. In this blog, we'll explore the importance of mold remediation after storms and flooding, as well as the steps involved in restoring safety.
Understanding the Risks of Mold
Mold growth can occur within 24-48 hours after water intrusion, spreading rapidly throughout a property if left unchecked. Mold can compromise the structural integrity of buildings, leading to costly repairs if not addressed promptly.
The Importance of Mold Remediation
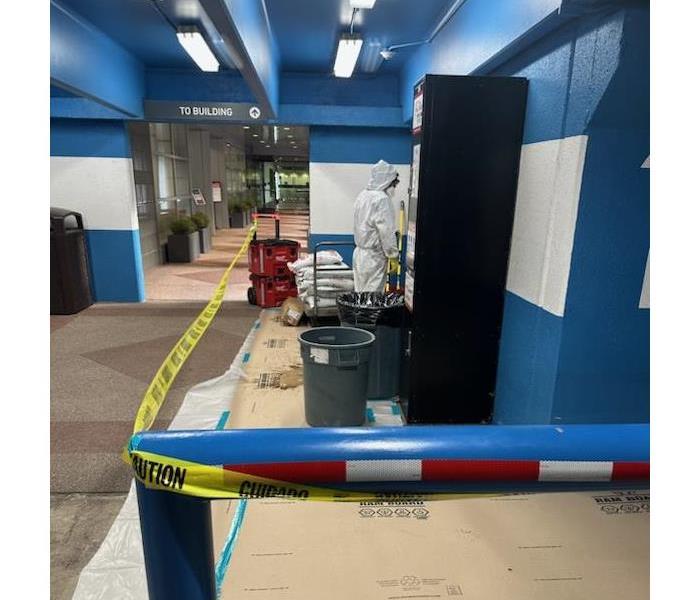
Mold remediation is essential for mitigating health risks, preventing further property damage, and restoring indoor air quality. Professional mold remediation services are crucial to ensure thorough and effective removal of mold colonies and the underlying moisture sources that fuel their growth. Attempting to remove mold without proper equipment and expertise can exacerbate the problem.
The Mold Remediation Process
- Assessment and Inspection: A certified mold remediation specialist conducts a thorough assessment of the property to identify mold-affected areas and moisture sources.
- Containment: Containment measures are implemented to prevent the spread of mold spores to unaffected areas. This may include sealing off contaminated areas and using negative air pressure systems.
- Removal of Mold: Mold is safely and systematically removed using specialized equipment and techniques. This includes HEPA vacuuming, surface cleaning, and, if necessary, removal of affected materials.
- Drying and Dehumidification: Moisture levels are carefully monitored and controlled to ensure complete drying of the affected areas. Dehumidifiers and air movers are used to expedite the drying process.
- Disinfection and Cleaning: The affected areas are thoroughly cleaned and disinfected to remove any residual mold spores and prevent future growth.
- Restoration: Any damaged materials or structures are repaired or replaced as needed to restore the property to its preloss condition.
Preventing Future Mold Growth
To minimize the risk of mold recurrence, it's essential to address underlying moisture issues and implement preventive measures such as proper ventilation, regular maintenance, and prompt repair of water leaks or damage.
Mold remediation is a critical component of post-storm cleanup and restoration efforts. By enlisting the help of certified mold remediation professionals, property owners can ensure thorough and effective removal of mold, safeguarding the health and well-being of occupants and restoring the safety and integrity of their homes or businesses. Don't delay in addressing mold issues after storms and flooding—take proactive steps to restore your property.
Mold Remediation After Storms and Flooding: Restoring Safety and Health
5/10/2024 (Permalink)
Storms and flooding can wreak havoc on homes and businesses, leaving behind more than just visible damage. One of the most insidious consequences of water intrusion is mold growth. Mold thrives in damp, humid environments, making flooded properties prime breeding grounds. In this blog, we'll explore the importance of mold remediation after storms and flooding, as well as the steps involved in restoring safety.
Understanding the Risks of Mold
Mold growth can occur within 24-48 hours after water intrusion, spreading rapidly throughout a property if left unchecked. Mold can compromise the structural integrity of buildings, leading to costly repairs if not addressed promptly.
The Importance of Mold Remediation
Mold remediation is essential for mitigating health risks, preventing further property damage, and restoring indoor air quality. Professional mold remediation services are crucial to ensure thorough and effective removal of mold colonies and the underlying moisture sources that fuel their growth. Attempting to remove mold without proper equipment and expertise can exacerbate the problem.
The Mold Remediation Process
- Assessment and Inspection: A certified mold remediation specialist conducts a thorough assessment of the property to identify mold-affected areas and moisture sources.
- Containment: Containment measures are implemented to prevent the spread of mold spores to unaffected areas. This may include sealing off contaminated areas and using negative air pressure systems.
- Removal of Mold: Mold is safely and systematically removed using specialized equipment and techniques. This includes HEPA vacuuming, surface cleaning, and, if necessary, removal of affected materials.
- Drying and Dehumidification: Moisture levels are carefully monitored and controlled to ensure complete drying of the affected areas. Dehumidifiers and air movers are used to expedite the drying process.
- Disinfection and Cleaning: The affected areas are thoroughly cleaned and disinfected to remove any residual mold spores and prevent future growth.
- Restoration: Any damaged materials or structures are repaired or replaced as needed to restore the property to its preloss condition.
Preventing Future Mold Growth
To minimize the risk of mold recurrence, it's essential to address underlying moisture issues and implement preventive measures such as proper ventilation, regular maintenance, and prompt repair of water leaks or damage.
Mold remediation is a critical component of post-storm cleanup and restoration efforts. By enlisting the help of certified mold remediation professionals, property owners can ensure thorough and effective removal of mold, safeguarding the health and well-being of occupants and restoring the safety and integrity of their homes or businesses. Don't delay in addressing mold issues after storms and flooding—take proactive steps to restore your property.
 24/7 Emergency Service